For this week’s quick lesson, we will be covering how to use and make changes to your Quick Access Toolbar in Microsoft Excel 365. Y
QUICK ACCESS TOOLBAR
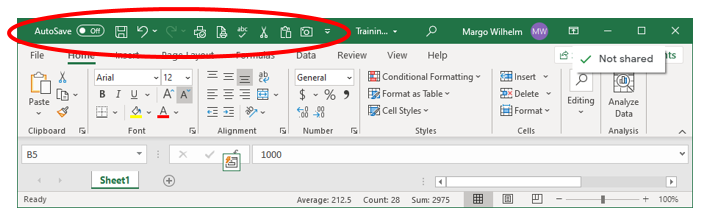
- When you open a new or existing Excel document in Excel, your Quick Access Toolbar is shown at the very top left of the screen. Here you can use commands that you will need most often. This saves you steps and prevents you from having to go into multiple menus in order to use common commands.
- Excel gives you a few default options on the Quick Access Toolbar such as Undo and Save, but you can customize this toolbar to better suit your needs.
- To view your options for adding or removing commands, hover over the icon that looks like a down arrow with a line above it on the far-right side of the toolbar. It should say “Customize Quick Access Toolbar”. Click the icon and a box showing a list of common commands will pop up.
- Selected commands will have a check mark to the left.
- Add a command – Click on the command you want to add from the list. The list of available commands will disappear, but a new icon for the selected command should now appear on the toolbar. If you open the list again, you should see that a check mark has been added next to the new command.
- Remove a command – To remove a command on the list, you simply open the list by clicking the down arrow icon, click on the command you want to remove and the list of available commands will disappear. If you open the list again, you will see that the removed command will no longer have a check mark to the left.
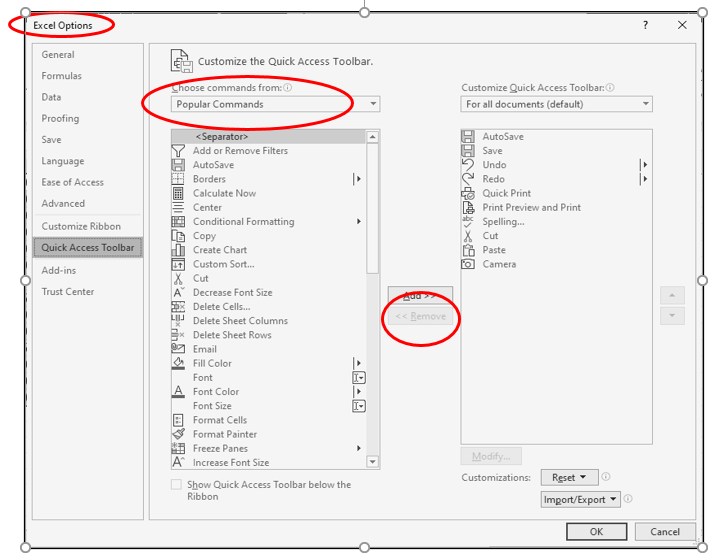
- More Commands – If you do not see the command you want to add, click on the “More Commands” option at the bottom of the “Customize Quick Access Toolbar” list and a larger dialogue box will open that says “Excel Options” at the top left. This will provide you with many more commands that can be added to your Quick Access Toolbar.
- Use this menu to add and remove less common commands to your Quick Access Toolbar.
- Add a command – Highlight the command you want to add from the available list on the left and click the Add>> button in the middle. This will add the command to the box on the right side.
- Remove a command – Highlight the command you want to remove from the list on the right and click the <<Remove button in the middle. You should no longer see the option available in the list on the right side once it is removed.
- More Options – If you do not see the option you wish add, find where it says: “Choose Commands From:” at the top and it should show that “Popular Commands” has been selected. Click on the down arrow next to “Popular Commands” and select “All Commands”. This will give you more options to choose from.
- Save Changes – Once your customization is complete, click “OK” at the bottom right to save your changes and you should see icons for the new commands on the toolbar and the commands you removed should no longer be shown.
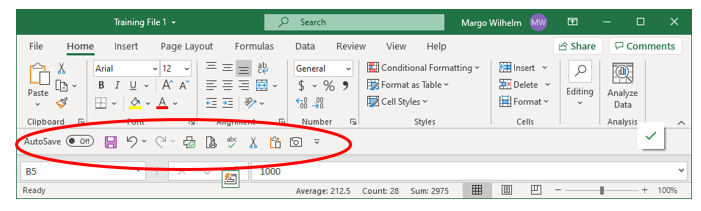
- Move the toolbar – You can leave the Quick Access Toolbar at the very top of your screen or you can move it to be shown below the Ribbon. Click on the “Customize Quick Access Toolbar” icon on the right and you will see the “Show Below the Ribbon” option at the very bottom of the list. This will move the entire Quick Access Toolbar. Once you move it, the move option changes to “Show Above the Ribbon”. You can move the toolbar back and forth whenever desired.
Once you are satisfied with your changes, you are ready to take advantage of the time savings you get when using the Quick Access Toolbar. Whenever you want to use any of the commands on the toolbar, it only takes a single click of the mouse to activate the command. You can still find these options in the Ribbon, but no longer need to go into the Ribbon to use them.
We hope you found this lesson to be helpful and informative and we look forward to seeing you in future lessons.